Saturday 31 August 2013

Annabelle on Swing

I'm having a break from Christmas cards (well it isn't September until tomorrow!) to show you one of the most summery cards I think I've ever made.  It features Annabelle on Swing from The Stamp Basket and some bright yellow gingham papers with green and lilac accents.

Don't forget there is a summer sale on at The Stamp Basket, with lots of new items added this week, including 25% off Memory Box dies.  Pop over there and stock up while the offer is still on.


See my cards available to buy on eBay
eBay


Card Recipe featuring items from The Stamp Basket:
I've been inspired by:
Happy crafting
Annette
xx

Wednesday 28 August 2013

There's something missing.

Hmm, no image.  I'm not sure it's really 'me', but it's certainly different.  I wanted to make a card showcasing the gorgeous papers in my Papermania Lucy Cromwell pad and didn't want to cover them up too much, and this is the result.  The brads are also Papermania gem brads that I've had for a while. They came in a mixed set, and I preferred the larger sized ones which I use a lot to hold ribbon bows on my cards, but the smaller ones seemed to have got forgotten until I decided to use them as alternatives to pearls on this card.

Beware ... it's quite pink!


See my cards available to buy on eBay

eBay


Card Recipe:
I've been inspired by:
Happy crafting.

Tuesday 27 August 2013

Purple Puppy Spots

I've got my Go Kreate frame out again to make another gorgeous shaped card, this time using a Crafter's Companion stamp called 'Friends'  He's a real cutie and I've also used some Crafter's Companion papers, although they're actually from a Christmas set, but as it was just a lilac spotty paper, I thought it would be ok to use it on a non-festive card. I've inked the edges with purple ink and stitched around the panels (I didn't risk sewing around the main card base shape as it looked a bit fussy to get the stitching neat!)

The Magnolia Doohickey twisted swirl die was cut in white again, and I coloured it to match my card colour scheme using copic V09.


See my cards available to buy on eBay

eBay


Card Recipe featuring items from The Stamp Basket:
I've been inspired by:
  • Crafter's Companion - Animals
  • Penny's Paper Crafty - Dies and/or Punches
  • Totally Papercrafts - Bows (both a ribbon bow and a bow type die!)
  • Simon Says Stamp Monday Challenge - Dotty
Happy crafting

Monday 26 August 2013

Getting cross with a criss-cross card

Considering the simplicity of the final design, this card was re-jigged several times.  I started off trying to make a diagonal joy-fold card, but only realised why I've not seen them anywhere else when I'd finished it, because it didn't work!  When the left hand fold was opened for the card to stand up, the inner folded square had to be so far open that you couldn't see the image very well.  So I had a rethink, and decided to make a criss-cross card instead, having to add the additional right-hand diagonal fold and cover up the square inside where I'd had to prise off my insert.

Hmmm, it's not ended up too bad, but at one point it nearly went in the bin!


See my cards available to buy on eBay

eBay


Card Recipe:
I've been inspired by:
Happy crafting.

Sunday 25 August 2013

Annabelle Hanging Gifts

I've got a traditional coloured Christmas card to share today featuring Annabelle from Wild Rose Studio. I've used some non-festive backing papers, but I think the colours are the perfect green for Christmas.  I've edged the card with some green ink and distressed the image panel a bit.


See my cards available to buy on eBay

eBay


Card Recipe featuring items from The Stamp Basket:
I've been inspired by:
Happy crafting

Saturday 24 August 2013

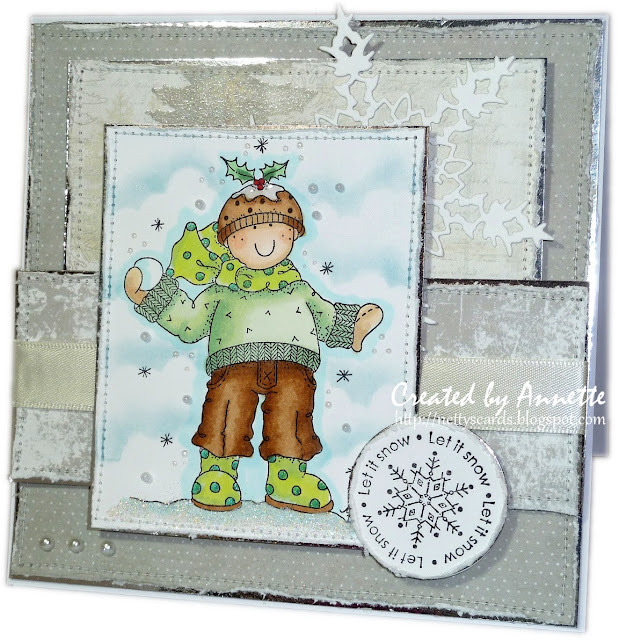
Snowball George

I've got my new favourite paper pad out today, First Edition Silent Night, and it's gorgeous. I'm really surprised at just how many of the pages I love, and these ones are no exception. They make a really lovely frosty looking card, and I think they are quite suited to male cards too (where I need all the inspiration I can muster!)


See my cards available to buy on eBay

eBay


Card Recipe featuring items from The Stamp Basket:
I've been inspired by:
Happy crafting

Friday 23 August 2013

Tiddly Inks Bookmark

Own up ... Who's friggin' bright idea was it to sew around the edges of a scallop?

This week has seen me venture well and truly outside my comfort zone with some C&S and quick creations as opposed to my usual time consuming fussy projects.  I'm not sure I'm totally converted, but I can see there are times when simple is good!

There are a couple of challenges that I wanted to enter, and this is the end result: a simple, single layer tag shaped fairy bookmark.

And yes, someone (no names mentioned) thought it would be a good idea to give it some extra definition by stitching around the edge.  BIG mistake.  It was not easy with all the fussy scallops.  But hey, once I'd started I couldn't stop half way around could I?  So I persevered and just about scraped through without too many hiccups.

I've added some glitter (hope that doesn't count as an extra layer) and a spotty ribbon looped through the top to stick out of the book.

Because it is to be used as a bookmark, I didn't want lots of thick layers that would stop the book from closing, so it's just one layer.  Yes, really!  I know you're shocked that I can do a single layer, no embellie project, but it's true.

I'm off to lie down as I'm suffering from embellie withdrawal symptoms!


See my cards available to buy on eBay

eBay


Bookmark Recipe
I've been inspired by:
  • Incy Wincy - One Layer (haha, you girls thought you'd caught me out with this challenge theme!!!)
  • Tiddly Inks - Back to School (hope a bookmark counts)
  • Simon's Wednesday Challenge - Back to School
Happy crafting

Thursday 22 August 2013

These are a few of my favourite things (with a small splash of pink)

The theme today at As You Like It Challenge is your favourite Shaped Cards (not a square) and if you visit often, then you'll know that I really love shaped cards.  But I've been hankering after a particular Go Kreate die for quite a while, umming and ahhing whether to indulge myself.  So I decided that this challenge could be the perfect excuse reason to treat myself.  And so I did!!!   And I LOVE it.  I think it's gonna get a LOAD of use.

This card is also a 'sorry I missed your birthday' card for a lovely blogging pal who has a bit of a penchant for pink.

So prepare to be overdosed in pink, with a small splash of pink for good measure.

This really is my kind of card; lots of pink (oh yeah baby!!) a cute girlie image, a bit more pink, gorgeous satin ribbon, a smudge more pink, some sparkles (gem brad, shimmer watercolouring, glossy accents), and some flowers.

I've also used some of my all-time favourite papers from Papermania's Lucy Cromwell pad, but unfortunately with all the 'stuff' I've added, you can hardly see them.  They're embossed and glittered, but only sneak through in the corners.  :0(     Trust me though, they're GORGEOUS (and pink)   :0)


See my cards available to buy on eBay

eBay


Card Recipe:
I've been inspired by:
Happy crafting.

Wednesday 21 August 2013

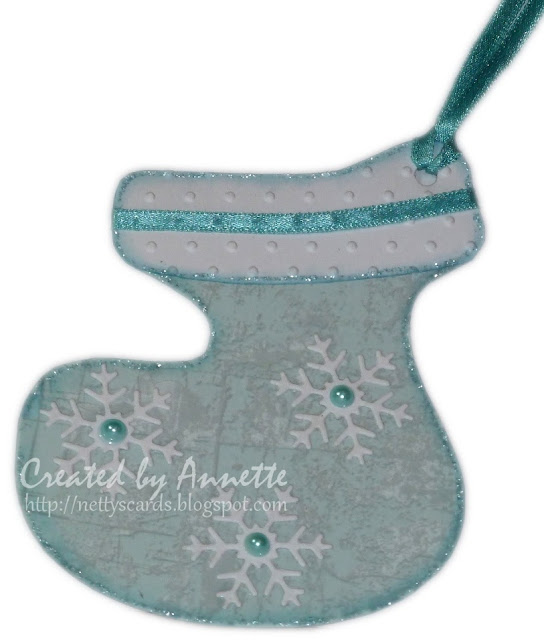
Stocking tag made from 'scraps'

The theme at ABC Christmas Challenge is Q for Quick, so I've made a little tag using a stocking template from Shape EZ.

This was truly a quick project and had the benefit of using up only scraps.  I cut out the stocking shape using a scrap of leftover designer paper, cut the top part of the stocking shape again in a scrap of white and embossed it before sticking it on with a strip of ribbon wrapped around it.  Even the ribbon was another "scrap" cut out from the shoulder of a jumper, you know those ribbon loops that just stick out from the neckline when you're wearing the tops?.  I then popped on 3 die cut snowflakes that were lying on my craft desk leftover from another project, added a couple of pearls in the snowflake centres and ran some stickles around the edge.  Finally I punched a hole in the top and popped the leftover bit of ribbon through as a loop to attach my tag to a pressie.


See my cards available to buy on eBay

eBay


Card Recipe:
I've been inspired by:
Happy crafting.

Tuesday 20 August 2013

Acetate Aqua Anniversary

The theme today at Top Tip Tuesday is to make something which includes items which begin with your initials.  So my letter is "A" and at first I struggled to think of anything beginning with the letter A, but my teamies helped me out with a whole host of a's, including anniversary and acetate, so that's what I used.   I also used the colour aqua, which makes 3 a's !!

I created a step card, and folded a 'tent' of acetate over it.  (shamelessly cased from a gorgeous Christmas creation that I found on Sonia's Crafty Patch). Although you can't see it too well in the photo, the back panel of the acetate is embossed with a vine embossing folder.  I used pale aqua papers to make the background look like sky, and used some grass and tree die cuts to create an outdoors scene.

Because it is an anniversary card, I also added a couple of heart borders, one hanging down from the acetate at the top fold, and the other on one of the steps.  The image is called 'roses are red' and kind of fits in with the love theme of my anniversary card.

Hope you like it.  Acetate is so hard to photograph and not get a shine reflecting from the lamp or camera flash!  This is the best shot I managed to get of it!


See my cards available to buy on eBay
eBay


Card Recipe:
  • Image - Saturated Canary Roses are Red, Violets are Blue 
  • Typed Sentiment ("Heina's hurry" font)
  • Colouring - Promarkers, Copics, Dovecraft Shimmer Chalks
  • Memory Box Cherish Hearts Border
  • Tree Die with chalked edges
  • Tonic Studio Butterfly Punch
  • Acetate
  • Craft Concepts Budding Vine Embossing Folder
  • QuicKutz grass die cuts
  • Ribbon
I've been inspired by:
  • Joanna Sheen - Embossing (the back acetate panel is embossed with 'budding vine' folder, but the acetate does not photograph well)
  • Saturated Canary - Winged Things
  • Stampin' for the Weekend - Butterflies
Happy crafting.

Monday 19 August 2013

The "polar" opposite of my usual fussy cards

Wow, this is a real C&S card from me today.  I embossed the top section of a square of white card, popped some Christmas ribbon over the edge of the embossed section, stamped my cute little polar bear image in the bottom corner, then inked and stickled the edges before stitching it onto red card which was then raised up on foam pads from by card base. Voilà!!


See my cards available to buy on eBay

eBay


Card Recipe:
I've been inspired by:
Happy crafting.

Sunday 18 August 2013

Annabelle and Tree

It's Christmas in August at The Stamp Basket still and I've got another Annabelle image today, but this time I've sneaked in some traditional red compared to yesterday's frosty theme.

The sentiment is a Whimsy stamp and cut out with a matching Whimsy notables die.  It's kind of a vintage image, so I've used vintage style ribbon rather than my usual sleek satin.  However, the papers are quite contemporary in contrast, but the colours all match to hold the card together.


See my cards available to buy on eBay

eBay


Card Recipe:
I've been inspired by:
Happy crafting

Saturday 17 August 2013

Hanging Gifts

Yup, I'm still in Christmas mode at the moment, but today I've used some gorgeous papers which are not really festive, but look kind of 'frosty'!  The beautiful aqua papers are from The Stamp Basket and the are so pretty it seemed such a tragedy to cover them up with 'stuff'!

I kept all the embellies either white or pale blue so they continued the frosty theme, and liberally sprinkled glitter in the snowy areas, as well as some pretty lace and pearls.

I really like this colour scheme for Christmas, and it makes a nice change from traditional reds and greens.


See my cards available to buy on eBay

eBay


Card Recipe:
I've been inspired by:
Happy crafting

Thursday 15 August 2013

Bella Sitting on a Pile of Presents

To make a change from the Christmas projects I've been making recently, I've got a birthday card to share with you today featuring some Wild Rose Studio products from The Stamp Basket.  The image is lil' Bella sitting on a pile of presents, and I've glossed and glittered her to the max to give her some sparkle.

The gorgeous papers are also Wild Rose Studio and I really love this aqua and purple colour scheme.  I've kept the embellies to a minimum to show off the pretty patterns on the papers, but I've distressed the edges of each paper panel and stitched around the edges for some interest.


See my cards available to buy on eBay

eBay


Card Recipe featuring items from The Stamp Basket:
I've been inspired by:
Happy crafting

Wednesday 14 August 2013

Crackers!! (and a freebie)

I'm afraid that I'm well and truly in Christmas mode today!  StampFairy are sponsoring Crafty Creations today, and the theme is to make 2 of something.  I've made a couple of Chrimbo crackers, one blue and one in pink!!

I made the base cracker from a 12" square scrapbook page, and I've included the template I created below in case any of you want to give it a try too if you like my versions.


The images and sentiments are raised up on foam pads.  Here's a close up of each cracker:


Freebie:
As promised above, here is my cracker template freebie that I've used above.  You're free to download it if you like it; click on the image for a larger version, then right click and 'save picture as' to save to your own computer. 

My conditions are as follows:
  1. Please become a follower, then you will see more freebies as they are posted,
  2. Please leave a comment on this post to let me know you've downloaded it, and
  3. Please don't share my freebies directly with other people (so please don't post them to Pinterest), but instead please direct people over here to collect it themselves.
  4. Please give me credit when you use them and post your finished creations on your blog.
I also adore seeing your creations using my freebies, so I'd really love you to send me an email with links to your creations so I can pop over for a peek!


See my cards available to buy on eBay
eBay


Card Recipe:
I've been inspired by:
Happy Crafting

Tuesday 13 August 2013

Fairy Sunny Day

I've been invited to be a guest designer for a couple of dates at Tiddly Inks and I'm really excited. It's not for a couple of months yet, but I love the cute and girlie images so I've been 'practising'!!

This creation is a really clean and simple design (well it is C&S for me!) but I've used my favourite papers and colours to help my mojo!  I've also shamelessly cased one of the layouts from Melissa here cos it really caught my eye.


See my cards available to buy on eBay
eBay


Card Recipe:
  • Image - Tiddly Inks Fairy Sunny Day
  • Typed Sentiment, traced and inked with Sakura Stardust Gels
  • Colouring - Promarkers, Copics, Sakura Stardust Gel pens
  • Clouds - Dovecraft Shimmer chalks
  • Cardworks Card base
  • Papermania Lucy Cromwell papers
  • Magnolia Doohickey Lace Border Die
  • Pink ink
  • Stickles
I've been inspired by:
Happy crafting.

Monday 12 August 2013

Silver Fairy

I've got a new image to play with today, and she's 'Silver Fairy' from Wee stamps.  This one's the rubber version, but she's also available as a digi, and I've painted her in my DI reinkers. I've given her wings some sparkle by painting over them with a watery solution of Sakura stardust gel pens and it does show some sheen in the photo if you look closely!  I had a bit of trouble with her hair (those plaits in particular), but it doesn't look half as bad as it did at one point!  Hmm, may need some more practice on this one!

I've used some vintage style papers from my new Silent Night paper pad, and added some white snowflake corner dies, some lace and some sheer spotty ribbon.


See my cards available to buy on eBay

eBay


Card Recipe:
I've been inspired by:
Happy crafting

Sunday 11 August 2013

Believe in your Dreams

Today's card features a cute little sleeping baby on the moon, and I've used a sentiment that I thought matches the image which says 'Believe in your dreams'!

The gorgeous papers are Wild Rose Studio from The Stamp Basket, who currently have a summer sale on at the moment.  The aqua ribbon matches the papers really beautifully, and I also found a bit of really narrow dark purple ribbon which I think was snipped off from the inside shoulder of a dress (you know the loops that are meant to hold it on a clothes hanger, but all they do is poke out the neckline when you're wearing it).

I've sneaked in a couple of precious stars which I thought matched the hanging star on the image.  A few flowers and of course some pearls, and that's it.  Voilà!


See my cards available to buy on eBay

eBay


Card Recipe:
I've been inspired by:
Happy crafting

Saturday 10 August 2013

Let's go fly a kite

My card today features Sun Kissed from The Stamp Basket, and she's currently on sale, as are the beautiful papers which are Magnolia and I'm sooo in love with them.  These are the Cloudy Purple Hearts, but I also have the pink and turquoise hearts which are my favourite. They're so pretty and subtle.  I tried to match the colours of my image to the papers to bring it all together.

The die cuts are all white to maintain the pale colouring, and I've used a Pine Needle Border and a couple of Summer Kites.  There's a piece of lace in there too, between the kites and the flowers, but it's quite pale so you have to have your specs on to see it!


See my cards available to buy on eBay
eBay


Card Recipe:
I've been inspired by:
Happy crafting

Friday 9 August 2013

Sugar Nellie Postcard

I bought some watercolour postcards a long time ago when I started to watercolour, and I've had a go at decorating one as an actual postcard rather than just using the front to practice on!

I've used a cute Sugar Nellie image called 'best day ever', and also a magazine freebie 'vintage postcard' stamp in the corner to make the postcard look more 'used'.

I've painted my image with DI reinkers and some watercoloured some Sakura Stardust gels to give it some shimmer.  The sentiment was traced directly onto the postcard and painted with a fine brush and DI reinkers.


See my cards available to buy on eBay

eBay


Card Recipe:
  • Image - Best Day Ever from Sugar Nellie
  • Jennifer Ellory 'from Paris with love' vintage stamps (magazine freebie)
  • Watercolour Postcards
  • Typed Sentiment
  • DI reinkers & Sakura Stardust Gels
I've been inspired by:
Happy crafting

Thursday 8 August 2013

Bunny Gift Tag and Bag

The challenge this fortnight at As You Like It Challenge is to showcase your favourite ribbon or twine, and I think it's fairly safe to say that my favourite ribbons are my gorgeous collection of double sided satin ribbon. I love the 15mm width satins as they make gorgeous bows, and I usually hold them on my project with a pearl brad, although this time I've used a gem brad.  I've used a really rich red satin today, on a decorated festive bag with a bit of a vintage theme.  The papers are from My Mind's Eye and feature birds, birdcages and some funky looking trees.

I've made a giant tag using matching robin papers from the same set, and featuring a LOTV image called The Night Before Christmas painted in my DI reinkers.

Here's the completed set :


Here's a close up of just the tag :


And here's the bag before I added the tag:


See my cards available to buy on eBay

eBay


Card Recipe:
I've been inspired by:
Happy crafting.

Wednesday 7 August 2013

P-p-p up a (Pink) Penguin

The theme today at ABC Christmas Challenge is P for, well, pick something beginning with the letter P!!!.  I've used the theme as a great excuse to dig out one of my favourite LOTV festive images, which is the aptly named 'Snow Cute'.

My P's are 3 of my favourite things; penguins, pink and pearls.  I've used my new Christmas papers again for the second day in a row, but in my defence they're gorgeous and I can't stop myself!!

I've also used, for the first time, some velvet ribbon which is really gorgeous. You can't really tell that it's velvet from the photo, but it feels really plush on the card, and gives it a lovely texture.

The Whimsy ornaments die has been cut in white card, then I popped out the snowflake middles, coloured them with R32 copic and popped them back in again, securing them at the back with a small square of tape to keep them in place.  I put a spot of liquid pearls or a real pearl in the middle of each snowflake, and edged the ornaments with pink shimmer chalk.


See my cards available to buy on eBay

eBay


Card Recipe:
I've been inspired by:
Happy crafting.