Friday, 7 February 2014

The definition of retirement

It's happening a bit more often than I'd like lately, but whenever I have a particularly crappy week at work, I console myself by remembering that it's one less week until retirement!

There's nothing like wishing your life away, huh!

Anyway, for one of my colleagues, that time has come (lucky lady).  She's taking early retiring, but however jealous I might be, I think it's fair to say that she's earned it.

I wanted to make her a 'Happy Retirement' card, but had two problems to overcome;  Not only do I find this theme quite a tough one, but also she's not really into my fussy style cards.  So I did some thinking, and eventually came up with a design which I hope she might like.

For such a simple card, you would not believe how much time it took to plan!  I even procrastinated for a while about adding a trio of pearls in one or other corner, but in the end decided it didn't need anything else. So I stopped.

Talk about 'Simples!'  :0)


Card Recipe, featuring items from The Stamp Basket:
I've been inspired by:


Happy crafting
Annette
xx


Thursday, 6 February 2014

James, With Love

I've been playing with James the bear again, and have just realised that I used exactly the same image a week ago today!  I did actually buy a few in the set, but seem to have inked up the same one twice so far.  I really must get the others out soon!

Anyway this card is to support the 'Love' challenge at Crafty Little Fairies and is also a bit of a LOTV-fest.  As well as the LOTV image, I've also used gorgeous LOTV papers and a sentiment from their Grunge set.

To meet the love theme, I have used a heart border punch, lovely red colour scheme, love sentiment and also a little red heart button tied up with the red twine.

James is painted in DI reinkers with a chalked cloud background.  I usually use Vintage Photo for painting bears, but today I tried a new DI colour combo out (expertly recommended by the talented Squirrel) which is Antique Linen and Frayed Burlap.  I do like it, but the Frayed Burlap seemed to go a bit pink at the top of his head (or perhaps my water pot had a bit of pink in it and was tainting the brush!), but otherwise, the shading wasn't too bad, although I think the flowers look a bit flat.  One day I might master this colouring technique!


Card Recipe:
I've been inspired by:
Happy crafting
Annette
xx


Wednesday, 5 February 2014

Chocolate and Cream

Today's project is to support the C for Chocolate and Cream challenge at ABC Christmas Challenge.  The chocolate part is the drinking chocolate that Henry the mouse is warming his paws on, and the creams are the papers (yup, I've got my Silent Night pad out again - sorry!)


Card Recipe:
I've been inspired by:
Happy crafting
Annette
xx


Tuesday, 4 February 2014

Girlie

I don't have many Tildas, but I realised that I've not used one for a while, so I thought I'd give one an inking.  I think this one's called 'Sweet Tilda', and I decided to opt for a fairly monochrome purple colour scheme.  The papers are a gorgeous shade from the Graphic 45 Secret Garden set, and they laid down the foundation for the rest of the card.  As there was a spot of green in the image, I added some pale green pearl accents and a little foliage behind my die cut flower.

I painted the image using DI reinkers but added some sparkly accent using a purple stardust gel pen.  I then outlined Tilda with a W1 Copic to lift her off the page a bit. (I tried to do it with my Pumice Stone DI, but it went a bit pinky when I tried to blend it, so I coloured over the top with the Copic instead).

The layers are all stitched onto purple bazzil card, and I used a little zigzag on one side to create a bit more interest.  This is something I've seen time and time again by the lovely Deanne, (here's my FAVOURITE card of hers which showcases the technique perfectly with the contrasting stitching).

This project is to support the Girlie challenge at Top Tip Tuesday which starts today.


Card Recipe:
I've been inspired by:
Happy crafting
Annette
xx


Monday, 3 February 2014

Heart to Heart

Today's project turned out to be a mini collection of heart shaped notelets.  I wanted to create some little notecards that could secretly slip into a lunch bag or coat pocket of someone special, so that it might be found later as a little surprise on a long day!  :0)

I love the shape of this heart, it's a lovely chubby heart, and creates quite a bit of space inside, perhaps enough for a mini poem!  I cut one heart "on the fold" so that it was a tent-fold heart card, and then folded the top in half again to create an easel.  I then cut another single heart in the same pink card and stuck it to the top to finish the easel shape.

I made a couple and decorated each one differently for a little variety.  A few of you will remember that I recently purchased the Nottingham Border die, and have been overusing loving it.  Well, the flowers on the first notelet are actually the bits that it cuts out (I didn't discard them) and so I'm getting even more value for money out of the die as it doubles up as a gorgeous flower die too, which I've layered up with a pearl in the middle.  :0)

They were so quick to make, and can then be stood up on the recipient's desk as a little reminder of your note!


Next, I used another heart, again cut on the fold at the top, and created a little tag that could be tied on a little valentines gift.  The image was actually part of a much larger image, but I cut off the big heart that the bear was carrying, and replaced it with a smaller die-cut heart instead.  I punched a hole in the corner, and threaded some pretty vintage pink ribbon to create the tag tie.

I've inked around all of my hearts, on all the projects with darker pink ink pad to define the edge.


Card Recipe, featuring items from The Stamp Basket:
I've been inspired by:
Happy crafting
Annette
xx


Friday, 31 January 2014

Marriage is like a deck of cards ...

In contrast to yesterday's card, today's is quite simple, with lots of clean white space.

I spotted a lovely Teddy Bo card on Lesley's blog a while ago (eeek, just noticed that it was over a year ago), and bookmarked it for later inspiration, and today was that day!  I've added one more element being the heart behind the tag, which complements the heart in the image.

It's not my usual style, but I'm really pleased with it.  I typed the sentiment and printed it in pink, but inked over the letters with a pink Sakura stardust gel pen to give it some extra sparkle.

Using the heart die did make me think of something amusing that I read the other day :
"Marriage is like a deck of cards.  
In the beginning all you need is two hearts and a diamond.  
By the end, you wish you had a club and a spade."     ;0)

That probably wouldn't be an ideal sentiment to pop on an anniversary card though, huh?  I think that I'm better off sticking to a boring 'happy anniversary' to be on the safe side!


Card Recipe, featuring items from The Stamp Basket:
I've been inspired by:
Happy crafting
Annette
xx


Thursday, 30 January 2014

My Style

Well the challenge themes I've followed on today's project have given me the chance to create something that really is my style of card.  I'm using the card to support the 'Your Style' challenge at As You Like It Challenge and also the 'Lavender and Lace' challenge at Crafty Little Fairies.  And the themes couldn't be better as far as I'm concerned!  :0)

So, let's cover why this card is my style ...

Well, where do I start!!

  1. My favourite LOTV character - I couldn't resist the latest set featuring James the bear and this is my first play with one of the newly released images.  
  2. I've taken the trouble (in honour of James the bear) to paint him with my DI reinkers rather than reaching for my Copics.
  3. Shapes - a lovely fancy nestie shape (for the image) and a shaped card.
  4. Stitching - I've taken the trouble to do some stitching (although I regretted doing the nestie shape - far too many curves and corners to get around it neatlly!)
  5. Pretty pastel colours - my top 3 colours are pink, aqua and purple
  6. Papers - My favourite Papermania paper pad
  7. Embellishments - Pearls are my 'go to' embellishments, and a must have on all my creations.
  8. Pretty coloured twine and lace
  9. Background clouds - I love creating these for the scene that it creates behind the image
  10. Colour coordinated elements - Everything is in various shades of purple and lilac, including an element of the image where I sneaked on a spot of purple on the daisies.

Yup, this is just my style!!!  Hope you like it too.

ps - I've just realised that another reason this is 'my style' is that, as is quite common on my cards, I've forgotten to put a sentiment on it.

At least it keeps it appropriate for any occasion!

That's my excuse, and I'm sticking to it.   ;0)


Card Recipe:
I've been inspired by:
Happy crafting
Annette
xx


Monday, 27 January 2014

Bear with me

Today's card is a sweet little bear and mouse holding some glittery heart balloons. The theme of the day is definitely pink, with a touch of brown in the vintage ribbon (I know it looks black, but it is brown, honest).  The gorgeous papers are so pretty and look a bit like fabric.


Card Recipe, featuring items from The Stamp Basket:
I've been inspired by:
Happy crafting
Annette
xx


Thursday, 23 January 2014

Argyle

I've had my DI reinkers out today to do some painting (wow, that's 3 times this month)!!  This time, it's James the bear with a bit of a masculine theme going on as he's sat with his footie shirt (although the shirt looks a little bit large for him!)

This project is to support the 'sporty' challenge at Crafty Little Fairies. I'm the first to admit that I'm hopeless at masculine themes, but when I saw the theme, I knew immediately what image I was going to use.

But I'm not sure about the papers now that I've finished the card.  The reason I used them is that the card is actually intended for a Plymouth Argyle footie fan.  The Plymouth Argyle kit is green, and the squares backing paper is an Argyle pattern.  I think I may have over-thought this because now I'm not sure about the colour combo.  Usually red and green are two colours which go together, so perhaps it's the shade of green I used, but something just doesn't feel right to me.


Card Recipe, featuring items from The Stamp Basket:
I've been inspired by:
Happy crafting
Annette
xx


Wednesday, 22 January 2014

Peek-a-boo

It's B for Bare Essentials at the ABC Christmas Challenge this fortnight.  I had actually read it as bear, rather than bare, and so thought it wanted a teddy image, but when I read it correctly, I realised it actually means don't overdress your card, and keep it to the bare minimum of embellishments!!  D'oh.

Luckily, I've covered both bases (by sheer chance, rather than intention!)

I've used one of my favourite LOTV images from their 2013 Christmas releases (although to be fair there were a few favourites from LOTV in 2013!).  I've teamed it with a simple 'Merry Christmas' ribbon, and frostyville border die.

I made a few of these C&S design Christmas cards last year, and quite liked the style.  It was quite quick to make and really showcased the image.  I also liked the cheat way of including a sentiment by using the pre-printed ribbon!


See my cards available to buy on eBay

eBay


Card Recipe:
I've been inspired by:
  • LOTV Challenge - Anything Goes
  • Sweet Stampin' - Your Style (this is pretty much my one and only C&S style. I love the simplicity of it, and the focus on the main image.  I made LOADS of these for xmas last year, and already made a springtime version since then)
Happy crafting
Annette
xx


Tuesday, 21 January 2014

A 'Fairy' Frequently Used Sketch

Today's card uses my most common sketch by far.  I think I might even be into double figures soon! :0)  I love it because it creates a lot of interest, with minimal effort, and only uses 2 sheets of 6x6 backing paper. 

I usually stitch the panels, but was so busy getting sticky that I forgot today!

This project is to support the challenge at Top Tip Tuesday where the theme is to use your favourite sketch.  Well, it's safe to say that I've done that!!  And if you doubt me, check out this post!!


Card Recipe
I've been inspired by:
  • The Sugar Bowl - Fairies
  • Graph'It - Anything Goes
  • Hobby House - Ribbons
  • Simon's Monday Challenge - Aqua (pretty much everything is aqua!)
  • Sweet Stampin' - Your style (pretty papers, pastel colours, girlie, pretty image, lots of layers, my favourite sketch, pearls, ribbon, no sentiment!)
Happy crafting
Annette
xx


Monday, 20 January 2014

Mobile Moby

I've got something a bit different to share with you today.  It's a decorative mobile featuring Moby Dick!

I cut out the little Memory Box Wonderful Whale several times, and coloured him in different shades of blues and greys (using the wedge end of my markers) before adding some googly eyes to each one.

I then cut out some other bits that I thought matched the sea life scene.  Each element can be stuck back-to-back sandwiching the string in between in order to to hang them onto the mobile.

The starfish are actually 5 point stars (Memory Box Precious Stars) with the corners rounded, and some white gel pen dashes for the 'seams'.   But I can see in the second photo that I missed the gel pen decoration on one starfish.  The seaweed bits are various leaves.

The hardest part of this project was actually taking the photos.  I took loads but on most versions at least one of the whales were sideways on, so they looked a bit skinny and you couldn't see the eyes!

These were the best two photos, and even then, they're not that great.  You might need to use your imagination a bit!!!


I've got a little tip for you.  Everyone knows that crafters like to keep things that most people would discard, but I wanted to show you what I used to make the water droplets.  Effectively they are the bits you'd usually throw away from the centre of the bow die cut:


Waste not, want not!!!  :0)

These little Memory Box Wonderful Whales are actually on sale at The Stamp Basket at the moment, so grab them while they're on offer.  There's nothing fishy about these prices!! *Groan*.

I'll get my coat!

As a little footnote, I decided that it probably was more a decoration than something suitable for a young child.  Some of the pieces are quite small and could easily be pulled off by little fingers and popped into small mouths.  But it was lovely to make and actually quite therapeutic to look at with all the little pieces twirling around.  It's a bit like watching flames on a candle! So like candles, this one's perhaps for grown-ups only! :0)

I've been inspired by:
Happy crafting
Annette
xx


Saturday, 18 January 2014

Beer Monster

I'm back in C&S mode today with a masculine(ish) card which I've made for a colleague's birthday at the end of this month.  I'm sure that hubster would point out that despite the monster image, this is still "cutsie", but it's as masculine as I get, and he's lucky it's not pink and glittery.

I used a paw print border die for the top to mimic the monster's footprints, but instead of cutting it, I used some tan embossing mats to emboss the paw print.  It was still a bit feint, so I lightly rubbed some green shimmer chalk over it.  Then it looked too dark, so I rubbed most of it off again with an eraser!  Some of the chalk seemed to stick to the twine though, so the top line of twine looks more green than the lower strip!

After all that, I thought that it still looked a bit 'unfinished' so I popped on a few pearls.

My masculine card supports the new 'For the Boys' challenge at A Gem of a Challenge which starts today.  Hope to see you join in with us.


Card Recipe.
I've been inspired by:
Happy crafting
Annette
xx


Friday, 17 January 2014

Floating

This image might be quite appropriate for the recent weather we've had in the UK, and we've certainly been making good use of our brollies over the last few weeks.  The image is called 'floating down the river', and I've used aqua coloured magnolia papers and blue accessories.


Card Recipe, featuring items from The Stamp Basket:
I've been inspired by:
Happy crafting
Annette
xx


Thursday, 16 January 2014

It's clear and simple, eat more cake

C&S is not usually my style, but I'm actually really fond of this version.  The die cut creates a bit of interest but has relatively no other embellishments.  Plus it's also almost completely flat, which is ideal for posting.  I've made a few cards in this style now, and really like it.

My Christmas versions of this style used the Frostyville snowflake border die, but today's birthday version features a Memory Box Nottingham Flower border die.  I am really liking this die at the moment, and snagged it in the sale at The Stamp Basket.  There are some dies that I buy and then wonder how I'm going to use them, but this is one that I predict will get a lot of use.

The only embellishments are some liquid pearls on the flowers of the die, and a thin pink satin ribbon, tied into a double bow, with my newly acquired bow maker, which is another tool I'm using a lot lately.

I debated whether to add a sentiment, or some pearls, but decided against both in the end.

I've been super efficient because this project is to support the 'favourite C&S style' challenge at As You Like It Challenge and also the 'In the Kitchen' challenge at Crafty Little Fairies.

And if you're doubting this is my favourite C&S style, then take a look here and here for some of the previous versions.  :0)


Card Recipe:
I've been inspired by:
Happy crafting
Annette
xx


Monday, 13 January 2014

Little Love Bear

I know it's only January, so a little way away from Valentines yet, but as it's dismal outside, I fancied making something to brighten the mood.

This little bear is called Little Love Bear and I quite fancy a little bit of what he's carrying as it looks like a box of chocs to me!  Although to be fair, I've probably had more chocolate than I should have done since Christmas!   :0)


Card Recipe, featuring items from The Stamp Basket:
I've been inspired by:
Happy crafting
Annette
xx


Sunday, 12 January 2014

Mimi Hearts

Despite my New Year's resolution (2 years running) to water colour my images rather than reach for the quick and easy option of Copics, this is only my second attempt this year to keep that going.

However, my other resolution, which was to not buy any more crafting goodies, has failed miserably.  To be honest, it had probably failed before I'd even gone back to work on 2 Jan.  Therefore I'm arguing that two outings of the DI reinkers in 2 weeks isn't actually bad going, in comparison!

Anyway, this is little Mimi with her sparkly heart deely-boppers.  I've used a paper from my favourite Papermania pad, but a design that I've not used much.  The colours of the paper matched the colours I'd used on my image perfectly, so my colour matching OCD was appeased.

I added little loops of purple ribbon with, sparkly edges behind the image panel using small red heart brads.


Card Recipe, featuring items from The Stamp Basket:
I've been inspired by:
Happy crafting
Annette
xx


Friday, 10 January 2014

Dotty Bunny

I was looking for papers to use for this image, and found two in my stash that were so alike it was uncanny.  The main paper on the base card is larger pink dots on red paper (Wild Rose Studio Bella's Birthday), and the strip across the middle, with the lace and twine, is Nitwit Joyful Hearts pink dot paper.  I thought they complemented each other quite well, although in theory the Nitwit one is actually from a Christmas set.

I've used a bit of white lace, but otherwise, all the embellishments are red.  With the red and green colour scheme, it could probably have been a Christmas card, if it weren't for the sentiment.  But this one's a birthday card for a friend whose birthday is in a few weeks.  Hope she likes it! :0)


Card Recipe, featuring items from The Stamp Basket:
I've been inspired by:
Happy crafting
Annette
xx


Thursday, 9 January 2014

Birthday Planner

Well this project nearly didn't get finished, and I still don't have all the parts I was hoping for.  I ordered some stuff on the tinterweb, with a scheduled delivery date of last Saturday, and it still hasn't arrived, so at the last minute (last night), I had to improvise!

I've been wanting to make a birthday planner since I saw a tutorial on Stempeleinmaleins last Spring, and decided at the start of the month that I was going to get myself organised.

I started making my version about a week ago, and made the main panel fairly quickly.  I then printed out all the names and dates, and die cut them out using a small circle die.  I decided to use little wooden discs for the months, but the jump rings that I had already were too small to loop through the wood, so I needed some larger ones.

I'm still waiting for them to arrive, so instead I dug out some gold jewellery wire, and coiled it around a pencil lots of times, and then snipped though the coil with wire cutters to create rings.  I used larger rings to link up the wooden months, and wound tighter coils to link up all the names underneath.

The little name tags do actually have the date and name, but I've smudged out the names on the photo as I thought some people might not like their birthday being shown.

Anyway, this is it in its temporary state, until the pesky jump rings arrive.  I'll bet they'll be lying on the mat when I get home tonight now.  Flippin' typical!

Hopefully you'll get the gist.

This project is to support the Kraft challenge at Crafty Little Fairies, and I used kraft card for all the name tags and a backing layer to the main image.  The satin ribbon is also 'kraft' coloured to match!


Here's a close up of the main panel, with the meeces wrapping their presents on the left ....


... and here they are with their balloons on the right ...


I've not used these images for a while, but I thought they were perfect to use together on this project.

I took so long making the jump rings that I also forgot that I was going to embellish the main panel with some pearls, but I don't think it looks too bad as it is.


Card Recipe:
I've been inspired by:
Happy crafting
Annette
xx


Wednesday, 8 January 2014

A Shameless 'Case'

Today's card is a shameless 'case' of a card I adore by the lovely Sarah of Mallows Crafty Bits.  I loved it when I saw it on her blog; she'd used my favourite colour, my favourite brand of digi papers, and one of my favourite image brands.  So I couldn't believe my luck when her gorgeous creation ended up adorning my sideboard after arriving in the post a week before Christmas!!! Thank you Sarah.  :0)

And just to prove how much I love it, I bought the papers (as opposed to the proverbial t-shirt!), and have shamelessly cased her sketch, but I've used the blue version of the papers for a frosty feel.

This project is to support the "A for Anything Christmas" challenge at ABC Christmas Challenge. I hope you join us. We're sponsored by Bugaboo, so there's a great reason to play along.


See my cards available to buy on eBay

eBay


Card Recipe:
I've been inspired by:
Happy crafting.
Annette
xx

Tuesday, 7 January 2014

Purple Thank You

It's a Clean and Simple theme at Top Tip Tuesday this fortnight, and I've opted for my safe fall-back layout!

I'm sorry if you've seen it before (a few times), but for a C&S novice like me, it's what I feel most comfortable with.  And with this layout I don't start any OCD-induced twitching from the lack of embellishments.

I've premièred one of my new rubber acquisitions. When I saw some samples from the Purple Onion Designs blog, it didn't take long for me to give in and place an order with Michelle who runs the store.

Quite a few stamps managed to accidentally fall into my basket, and they arrived within a couple of weeks from across the pond.  They're slightly smaller than I'd expected, but they are gorgeous and stamp perfectly.  So in order that the image didn't look tiny on my usual 6" card bases, I've made a marginally smaller 5" base card for this one.  Luckily I've found a matching envelope for it.


See my cards available to buy on eBay

eBay


Card Recipe:
I've been inspired by:
Happy crafting.
Annette
xx

Monday, 6 January 2014

Geekin' It (and a January Sale)

Today's card is another one made with someone special in mind, although to be honest it's probably more my style than hers, and I'm not entirely sure she likes pink as much as I do.  Whoops!

The theme is a bit book-worm-ish, although they're meant to relate to the recipient's job (she's an accountant) rather than paperbacks.  I was trying really hard to get the colouring right, and was doing ok until I got to her boots, where I seem to have changed the light source from the front, to then coming from both the left and right at the same time.  Shhh, don't tell anyone and I'm sure they won't notice!

The stamp was a gift from my lovely friend Samantha, but I know she won't like that I've tarnished it with all this pink!  ;0)  Thank you Samantha, she's lovely.

Also don't forget there's still a massive SALE at the Stamp Basket.  Lots of new discounts have been applied yesterday, so pop over there to stock up while the prices are slashed.  It'll keep your craft stash topped up so you can keep busy in the dark and dingy months!  :0)


Card Recipe, featuring items from The Stamp Basket:
I've been inspired by:
Happy crafting
Annette
xx


Friday, 3 January 2014

Pink Bella with Daisy

Although I'm still itching to get my snowflake dies out, I'm forcing myself to have a bit of a break from the Christmas themes at the moment, although I imagine they'll be sneaking back onto my blog before long.

I'm back in pink mode today with a Wild Rose Studio image aptly named Bella with Daisy.  It's definitely not Christmassy, but could really be for any occasion as I've not put a sentiment on it.

The papers are gorgeous Magnolia ones that I've been saving for a rainy day.  And believe me, on the weather front, today is definitely counting as a rainy day. Even the ducks have their wellies on today.

Still, I'm not complaining as the bad weather means I can spend more time crafting! :0)


Card Recipe, featuring items from The Stamp Basket:
I've been inspired by:
Happy crafting
Annette
xx


Thursday, 2 January 2014

Playtime Kitten

Wow, not only 2 cards from me today, but they're both using the same sketch.  This one is the complete opposite of my pink and girlie card earlier though as this time it's a baby boy card.

Again I've made it with someone in mind, although the little'un is not actually due for another few weeks yet.  As it's for a baby boy, I've kept the embellishments even lighter, but still couldn't resist adding the doily and a few pearls.

The sentiment is a small blue enamel brad which reads 'It's a boy'.  I've also been brave and used DI reinkers to water colour the image, although I might need a bit more practice with the paintbrush as it's been a while since I picked it up and I struggled a bit with the grey!!!  :0)

This card supports the 'Starting Over' challenge at Crafty Little Fairies.  I hope you pop over to join the challenge and see what my talented teamies have created to entice you.


See my cards available to buy on eBay

eBay


Card Recipe:
I've been inspired by:
Happy crafting.
Annette
xx

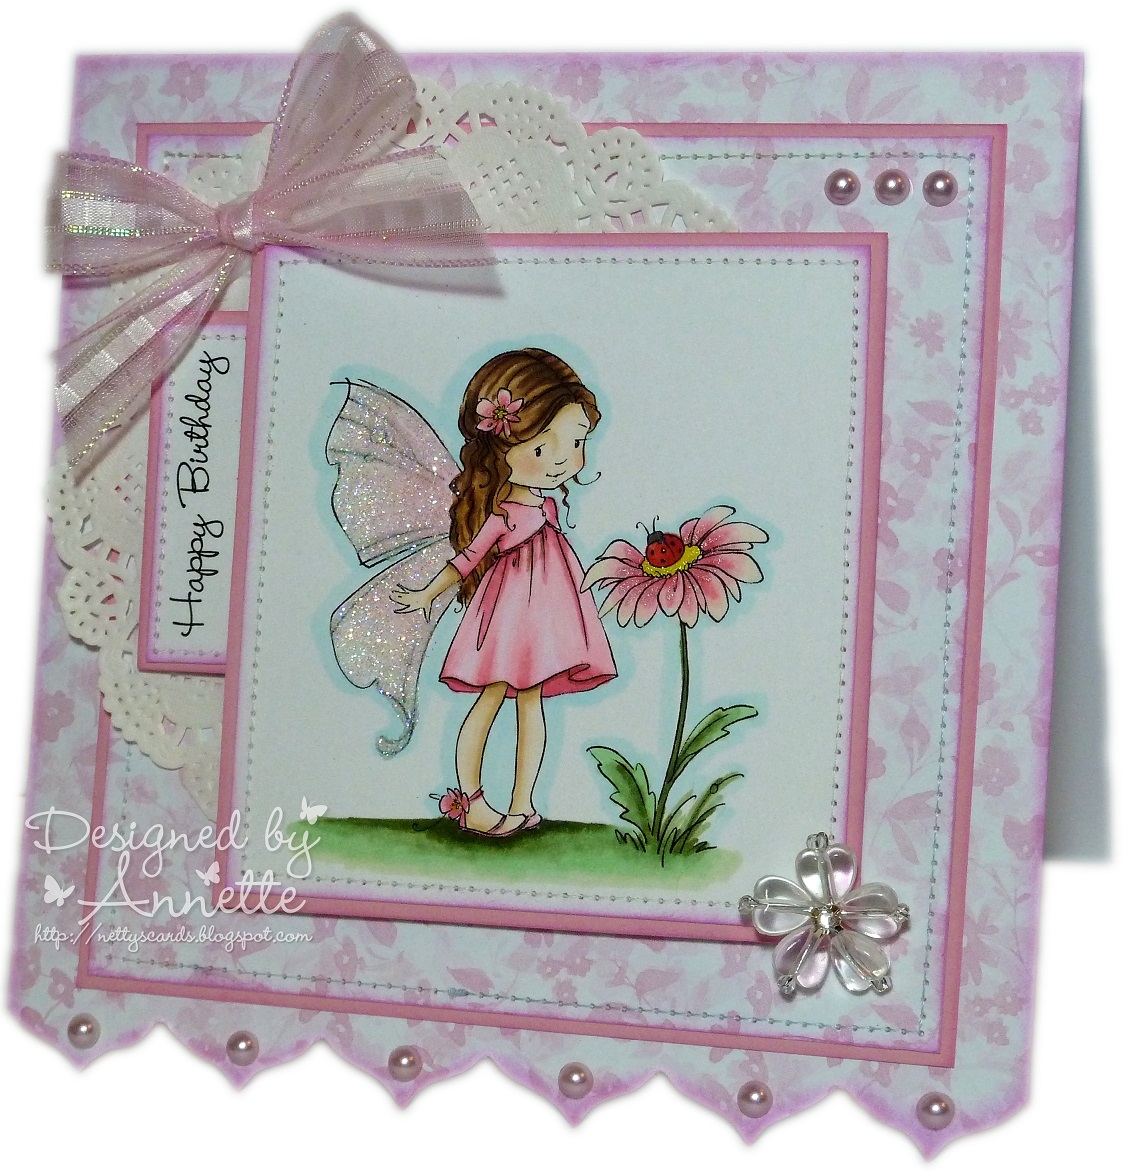
Just a splash of pink

Happy New Year, and I hope you had a good New Year's Eve celebrations.  We stayed in with a Chinese takeaway, and even the kitties provided lap-warming services for the entire evening. I'm sure their presence was nothing to do with the torrential rain that they'd have been subjected to if they'd gone out.

It's been a whole month since I made a card that was not a Christmas card, and what better way to start the new year than with a creation featuring my favourite colour.  I've also been treated to some new Sugar Nellies for Christmas by hubby, and have used one on today's creation.

This card has been made with someone specific in mind, and a little birdie tells me that pink is also one of her favourite colours, so this challenge has worked a treat.

I've stitched the panels, typed the sentiment and followed a sketch that had taken my fancy this week.

The gorgeous crystal flower embellishment in the lower corner was a gift from Christine.  It's really stunning; thank you honey, I love them and will use them on my favourite creations.  To avoid distracting from the lovely flower, I didn't want to put too much more on the card, so just dotted on some pearls and a shimmery bow.  Voilà!

This card is to support the challenge at As You Like It Challenge where the theme is to use your favourite colour.  And if you didn't know, for me there's no question, it's pink all the way for me!


See my cards available to buy on eBay

eBay


Card Recipe:
I've been inspired by:
Happy crafting
Annette
xx